If your original box is just a piece of waste, stinks like an ashtray or you just don’t have any, you can create your own with only a few materials, skills and a lot of time.
Materials you need, depend on the quality of the product:
1) A near-to-original box is made of glossy photo paper glued onto 200-300g/m2 paper
2) A good looking box is printed onto “better” inkjet paper, about 90-110g/m2 and glued to the same 200-300g paper
3) Everything less than total weight of 280g/m2 isn’t even worth mentioning
For my SNES boxes I used:
– Canson paper of 240-260g/m2 weight. It is slightly textured on one side, the verso is plain.
– “Canson Digital Ultimate Photo Paper 240g”
– Fresh inkjet cartridges (the expensive part…)
– 3M Spray Mount (about 15eur per can)
– Uhu Glue (“Uhu Alleskleber”)
– A sharp cutter and scissors
– A cutting board (recommended!)
Preparation:
– Clean the printer ! Dust is bad, and if you want, open the printer’s doors etc. to clean it from old ink
– Clean your desk / working bench
– Clean your hands !
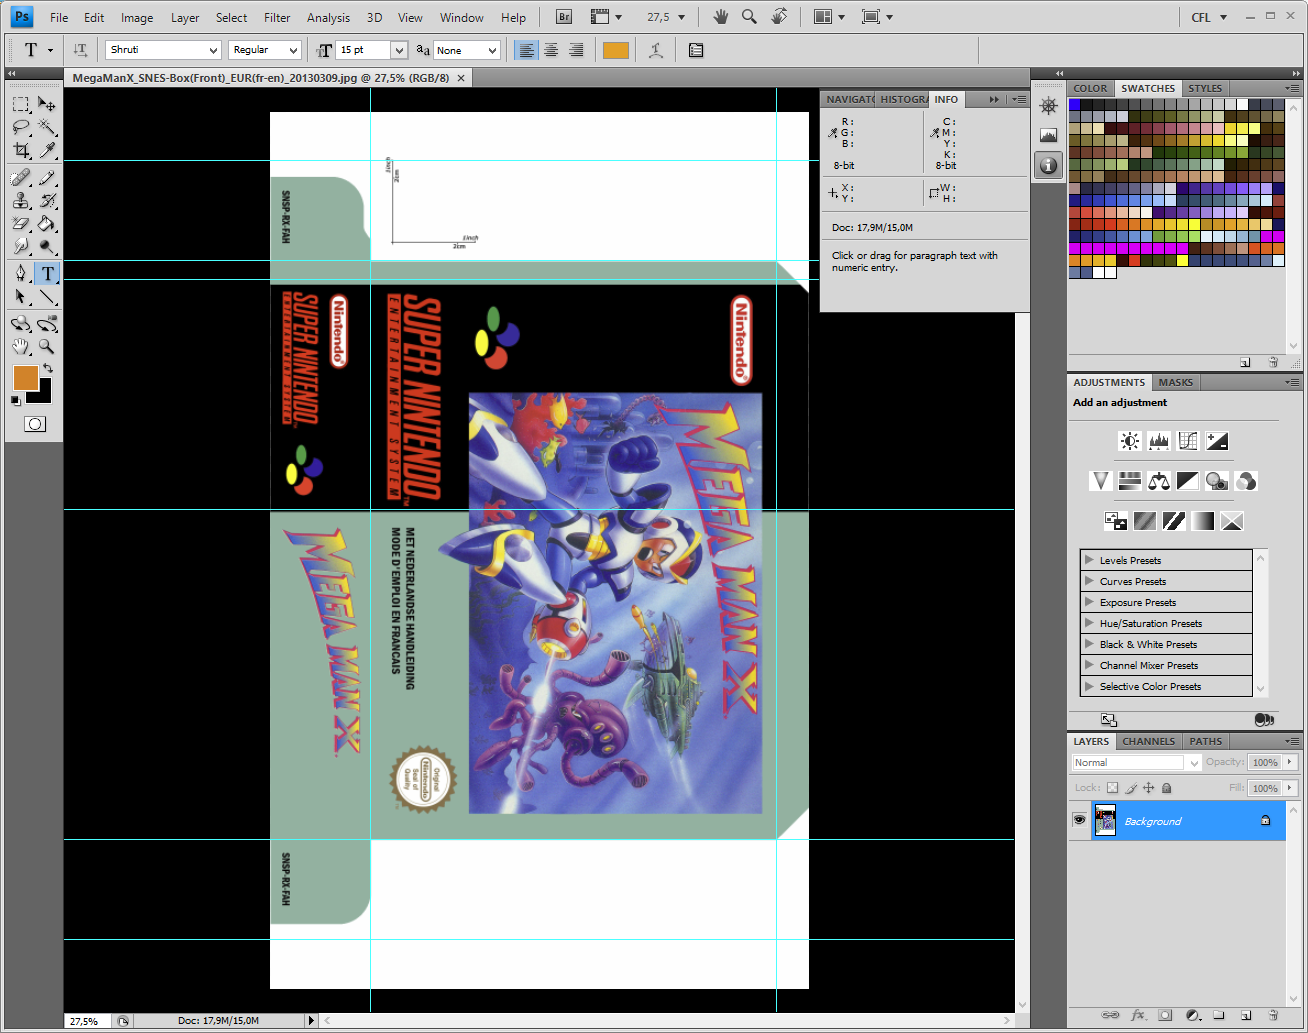
– Get your template. Nintandbox has many of them, some in extremely good quality, but often in french/dutch version.
– Get some imaging program to print the templates. I use Photoshop, you can also use theGimp or even irfanview
Printing:
– Open your downloaded file. In my case, I used the DIN A4 files from Nintandbox, as I don’t have an A3 printer
– The original Nintandbox image shows some helper lines that are not printed. Press Ctrl-P to open the print preview.
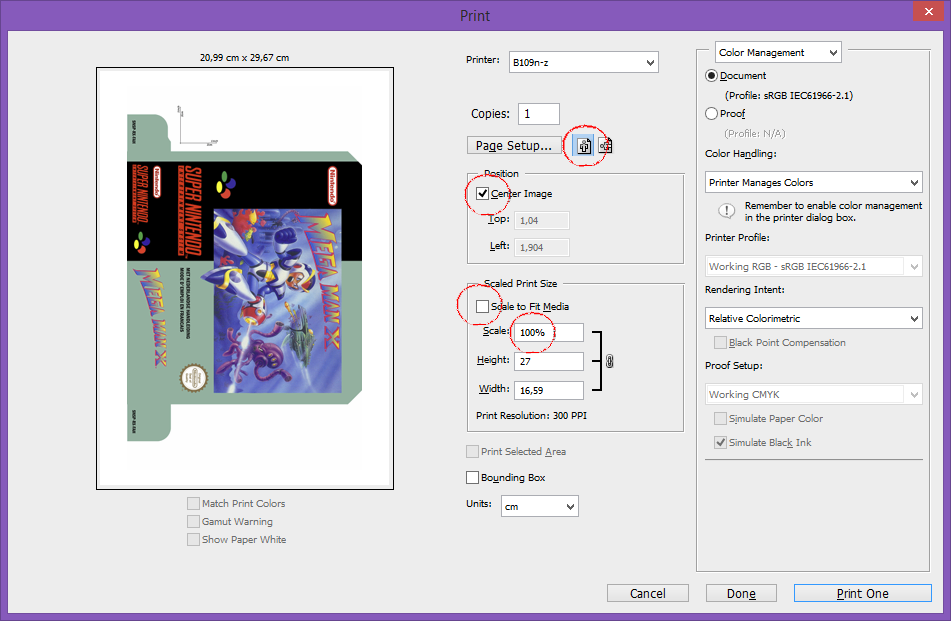
– Make sure you keep the defaults: Portrait view, Center the image (up to you), do NOT scale to fit media!!, check the 100% scale
– Also make sure you configure your printer before pressing print: use the glossy paper and max quality color settings!
– Only insert 1 photo paper sheet at the time. I use 1 sheet of plain paper to support the sheet in the paper tray, as I don’t want the glossy side to slide up the tray.
– After the print, immediately remove the sheet and add some weight to the NONPRINTED area of the sheet to prevent bending.
Click –HERE– for Part 2 !
Pingback: Jigo's Blog - Nintendo Mods - Raspberry Pi - IT